
FARGO — Valentine’s Day is right around the corner, and these Red Velvet Sugar Cookies are the perfect treat to help you celebrate in style.
These colorful cookies have crispy edges with a velvety soft center, and terrific flavor. Even better, they are easy to make, bake quickly and have a dramatic color that makes them perfect for any red-themed occasion.
ADVERTISEMENT
The red velvet in these cookies comes from a combination of unsweetened cocoa powder and either red food coloring or a red velvet emulsion. The emulsion, which can be found online or at craft and hobby stores, adds both color and flavor to these cookies, and since it is water-based, the flavor won’t evaporate as the cookies bake. For food coloring, I recommend using either a gel or paste variety, as the liquid type can add too much moisture to the dough.

Other than the coloring, this is a pretty straightforward recipe using common ingredients that you probably already have in your pantry: butter, sugar, powdered sugar, flour, cocoa powder, baking powder, salt, eggs, vanilla extract and white vinegar. Room-temperature ingredients are key to successful baking, and I usually pull my butter and eggs out 30 minutes before I begin.
I start by whisking the dry ingredients together and then set them aside until later in the process. Next, I cream the butter with a blend of powdered and granulated white sugars in a stand mixer fitted with the paddle attachment until the mixture is light, fluffy and well-combined. This step takes about minutes and is worth the effort. The creaming process aerates the dough to create a smooth and tender texture in the cookies as they bake.

Next, I add one egg, beating hard until it is fully incorporated, about one minute. The liquids come next, followed by the mixture of dry ingredients, which are mixed in on low speed just until the flour is fully incorporated, and a dough begins to form. It is important not to overmix the dough, as this can cause the cookie texture to become tough and crumbly.
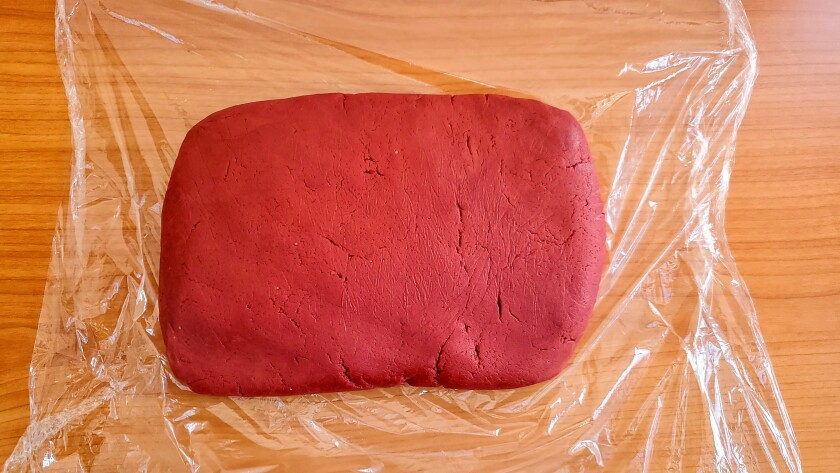
Once a dough has formed, I place it onto a piece of plastic wrap, flatten it into a rectangular disk about 1-inch thick, wrap it in the plastic and refrigerate it for 20 minutes. This dough is too soft and crumbly to roll out immediately and requires the refrigeration time to become firm enough to roll.
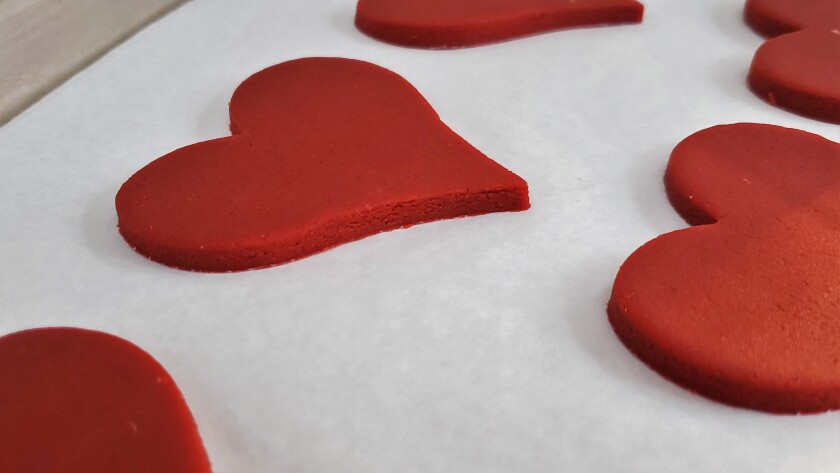
I roll the dough out to a thickness of a quarter inch, and then use a cookie cutter to cut the dough into various shapes. Once cut, the cookies can go straight into the oven without any additional refrigeration. These cookies bake quickly and will be ready to remove from the oven in just six or seven minutes.

They can be stored in an airtight container for up to one week, and they also freeze beautifully.
ADVERTISEMENT
My SarahBakes Valentine’s Menu features these spectacular cookies with a swirl of luscious buttercream, but they are also great dusted with powdered sugar, dipped in melted chocolate or even just plain. Decadent and devilishly delicious, these Red Velvet Sugar Cookies will bring a splash of color and romance to your Valentine’s Day.
Red Velvet Sugar Cookies
Makes: about 3 dozen 3-inch cookies
Ingredients:
3 cups all-purpose flour
2 tablespoons unsweetened cocoa powder
1 ½ teaspoons baking powder
¼ teaspoon kosher or sea salt (skip if using salted butter)
1 cup (2 sticks) unsalted butter, room temperature
¾ cup white sugar
½ cup powdered sugar
1 large egg
2 ½ teaspoons red velvet emulsion or red gel food coloring
1 ½ teaspoons pure vanilla extract
½ teaspoon white distilled vinegar
Directions:
In a large bowl, whisk together the flour, cocoa powder, baking powder and salt; set aside.
Use the paddle attachment of a stand mixer, or a hand-held mixer, to beat the butter for 1 minute on medium speed. Add the sugars and cream and mix on medium speed for 3 minutes until light and fluffy. Scrape down the sides and bottom of the bowl. Add the egg and beat on medium speed for 1 minute until fully incorporated.
ADVERTISEMENT
Scrape down the sides and bottom of the bowl. Add the vanilla, red velvet emulsion or food coloring, and vinegar and beat on medium speed for 1 minute until blended. Add the flour mixture and mix on low speed just until the flour is fully incorporated, and the dough begins to pull away from the sides of the bowl, about 1 minute. Be careful not to overmix or the cookies may become tough in texture.
Preheat oven to 375 degrees and line a baking sheet with parchment paper.
Remove the dough from the bowl and place it on a large piece of plastic wrap. Press the dough into a flat rectangle about 1-inch thick. Wrap the piece in the plastic wrap and refrigerate for 20 minutes.
Remove the disk of dough and cut it in half. Place half onto a piece of parchment paper on a hard work surface (like your countertop); cover the second half with plastic wrap and return to the refrigerator. Use a rolling pin to roll the dough out until ¼-inch thick.
Use a cookie cutter to cut into desired shapes and place them onto the prepared baking sheet spaced 1 inch apart. Repeat with the other half of dough or freeze that in an airtight freezer bag or container for up to 1 month.
Bake until the cookies puff up and the edges are just firm, about 6 to 7 minutes. Remove from oven and let the cookies cool on a baking sheet for 3 minutes, then transfer to a wire rack to cool completely.
Serve plain, dusted with powdered sugar, dipped in melted chocolate or decorated with icing.
ADVERTISEMENT
To store: Place cookies in an airtight container and store at room temperature for up to 1 week or freeze for up to 3 months.
Recipe Time Capsule:
This week in...
- 2021: Penne alla Vodka
- 2020: Strawberries & Cream Scones
- 2019: Savory Sicilian Palmiers
- 2018: How to Make Water
- 2017: Herb Crusted Pork Tenderloin Roast
- 2016: Seared Sea Scallops with Basil Pesto Cream Sauce
- 2015: Blackened Tilapia with Red Onion Caper Vinaigrette
- 2014: Clipper Chipper Cookies
- 2013: Flourless Chocolate Torte
Recipes can be found with the article at InForum.com.
“Home with the Lost Italian” is a weekly column written by Sarah Nasello featuring recipes by her husband, Tony Nasello. The couple owned Sarello’s in Moorhead and lives in Fargo with their son, Giovanni. Readers can reach them at sarahnasello@gmail.com.